Thursday, January 31, 2019

Installing ancillary's, reassembling the front suspension

Hi There,
Yesterday I worked a little bit on fixing something that I did last time I had Jennifer's car here,  I was having a very hard time finding hose that would work for the line from the brake reservoirs to the slave and master cylinders.  Well, I had the bright idea of using silicone hose as I thought it would be impervious to DOT 4 brake fluid-NOT!  When Jennifer brought her car back over this winter for me to replace the clutch I noticed that the fluid level had dropped in the reservoirs just a slight bit, turns out the it was weeping through the sides of the hose.  This time around I ordered some hose from SNG that should do the trick.

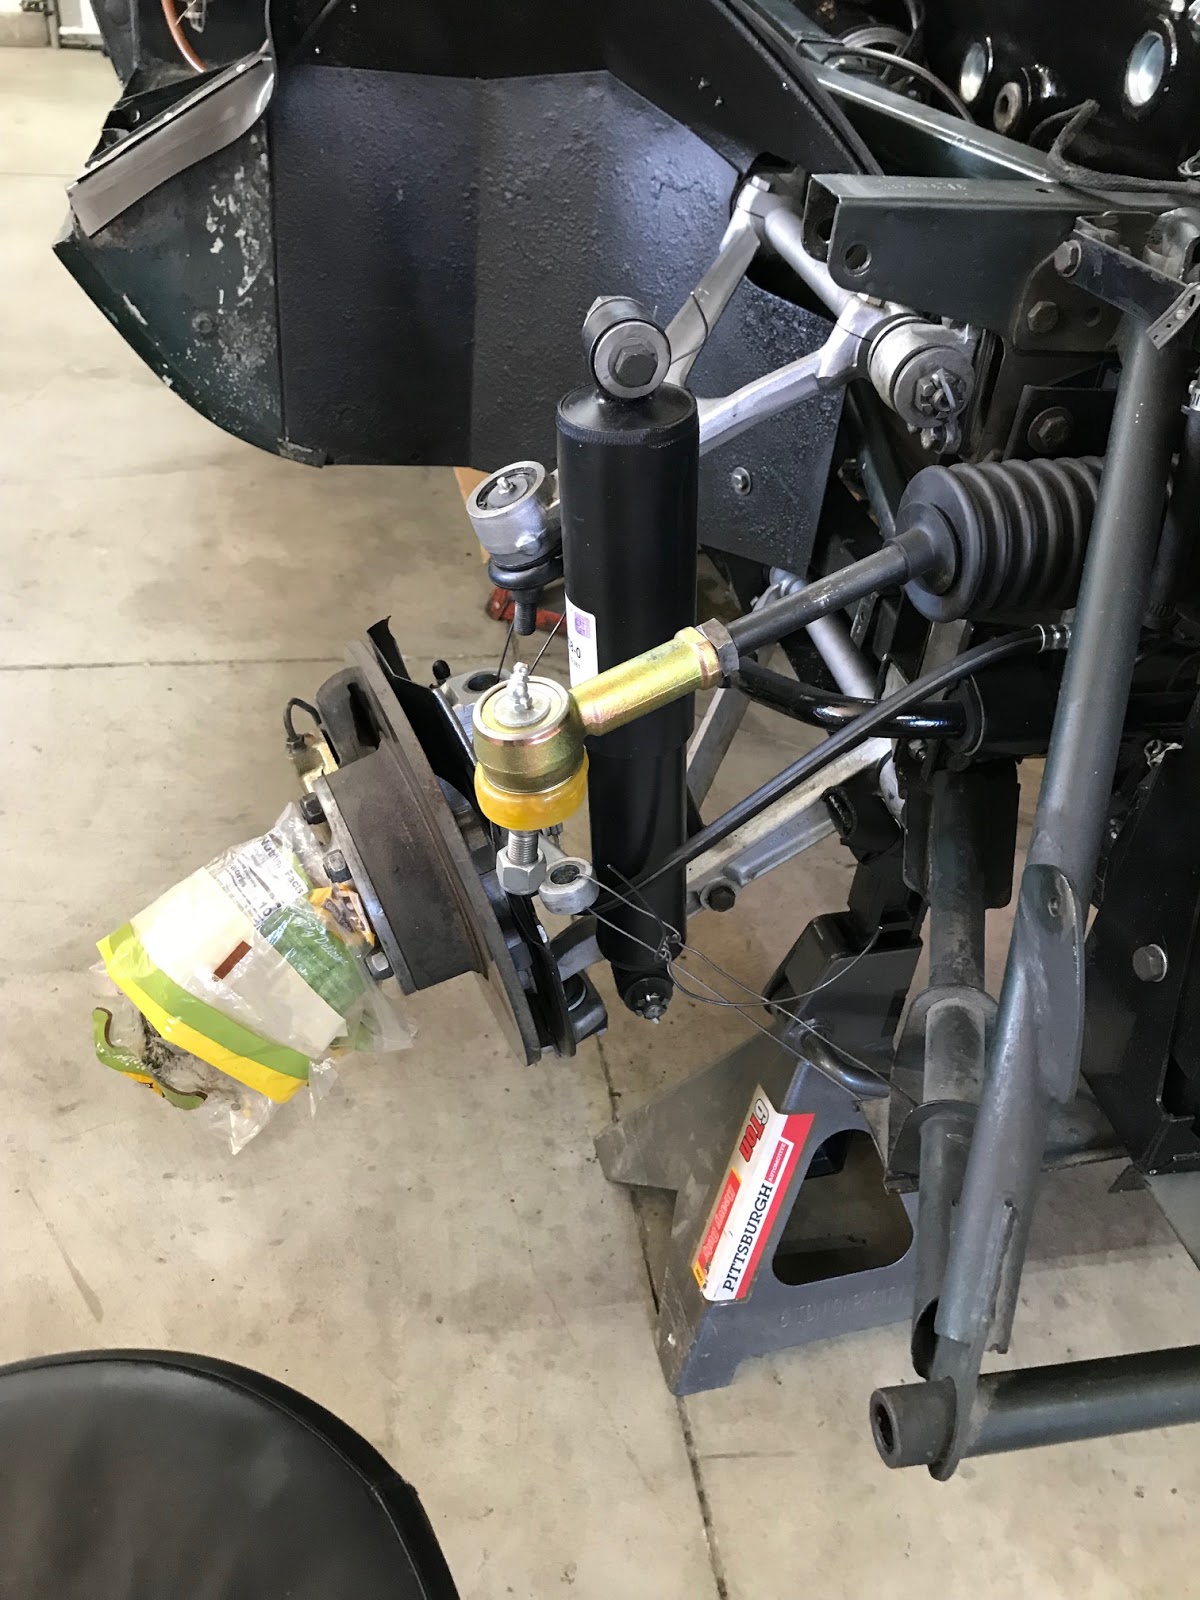
Today I reassembled the front suspension and installed the heat shields, exhaust manifolds, alternator and a few other little tidbits.


Suspension had to be released to allow the torsion bar plate to come out, which had to come out to get the engine/transmission out.

Hooking it all back together requires a good floor jack to over come the torsion bar.

Front suspension back in place with loosely fastened bolts on the rubber components-they will be tightened once the car is in a loaded position (carrying the weight of the front end).

Installing the rear exhaust manifold-tedious as the nuts are challenging to get to.

Front manifold on, and alternator installed.

Notes for the day and a few check off's that I'll have to take care of.

Gaskets are supposed to arrive tomorrow but may be tied up with family things so this may be it for the week, stay tuned for further developments ;-)

Cheers,
Lynn


6.5 hrs

Tuesday, January 29, 2019

Coming together, ancillary parts and pieces

Evening folks,

I'll keep it kinda short today as there's not much to see.  The day was spent installing parts and pieces, some of which show up in pictures and some that don't.  I woke up this morning thinking I might have to drop the engine again as I had forgotten to install the crankshaft pulley, it turned out OK and with just a bit more fiddling than it would have been if it were out in the open, we got it on.

Water pump is in, was able to get it in place and access the bolts BUT the pulley has to be loose.  The pulley has to be loosely installed as there isn't enough room to slip it in between the upper frame rail and the water pump.

Oil filter housing installed and bolts tightened to 17ft/lbs

Oil filter housing, canister and direct reading oil pressure pickup installed as well as new oil pressure sender.  If you look very closely and know where to look you can see the reinstalled reaction plate.

Idler pulley, water pump, alternator mounting bracket


Well, that's it for today.  Still waiting for the gaskets for the intake manifold and etc.

Cheers,
Lynn


6.5 hrs

Monday, January 28, 2019

Engine in! "Reunited and it feels so good..."

Evening folks,
The engine is back in!  Yippie Skippy!   
I want to thank Richard Owen and "Dana" from JL for the their U Tube video on installing the engine: https://www.youtube.com/watch?v=JajeP90-tI0

I Have always removed and installed the engine from below but I had the car on stands with the nose elevated to about thirty degrees thinking that I to have it like this to clear the torsion bar mounts that protrude into the space.  Well, having watched the video I was motivated to try it by having the car chassis horizontal and then bring the engine up into the engine compartment parallel to the chassis.

As per the video I installed the clutch slave cylinder and flex tubing, if it works it will save a considerable amount of futzing later on
The front of the car up high enough that the engine and transmission could be rolled  under the frame rails and centered in the compartment


With the engine in place under the car the hoist is used to lower the chassis down over the engine

I had to move the jacks and center a jack stand on the front frame rail, otherwise the jack stands would block the engine crane from rolling into position

Dropping the chassis down, keeping a close eye and ear out for any contact

I bit tight at the back, paying close attention to the drive shaft flange and bolts


Reattaching the crane to the engine and lifting it up into the engine compartment,  It's very tight along the sides at the TB "ears" and has to be 'wiggled' back and forth just a bit to clear the left side then the right side.


Making sure the engine is square on the mounts and as far forward as possible


Installed, the rear mount was installed using the floor jack under the transmission, I have a block that I put under the rear transmission mount/spring then raise it up into place and use the jack to hold the mount in place while I fasten the two outer bolts, then drop the jack and install the three remaining bolts


Tomorrow I'll start attaching ancillary's but waiting for the Cometic gaskets that should be here any day.

That's all folks

Cheers,
Lynn

6 hrs

Friday, January 25, 2019

Together again-Transmission/Engine

Evening You All,

Today the transmission and engine were reunited and along the way the clutch/pressure plate were installed.  Then the stabilizer was mounted and the starter cleaned up and inspected.
New clutch plate

Mounting the clutch and pressure plate on the flywheel.  

If you look closely you may be able to see the alignment 'pins' that I have made to align the  bell housing. This is alway a little bit of a challenge as one doesn't want to put the clutch plate in a bind which could warp the clutch plate and the pins help keep everything aligned.

The bolts are then inserted and tightened down 1 turn at a time to close the 'gap' evenly

Once the transmission was mounted I checked the action of the release bearing by clamping down the clutch fork to make sure it released, a good place to check that all is as it should be so far.

Just decided to take a picture of the engine number to show that it is a matching number car, same with the transmission.


These are the bolts for installing the clutch slave cylinder, as you can see I've replaced the studs with allen headed screws which are easier to get at for servicing.

Cleaning up and inspecting the starter which needs to be mounted next, the minimum lenght for the brushes according to the manual are 5/16ths", Jennifer's are a little over 9/16th's so should be good for a few more years.

Starter installed and bolts torqued to 25 ft/lbs


Well, that's all for this week, thanks for looking.

Cheers,
Lynn


5 hrs

Thursday, January 24, 2019

House Keeping and installing the flywheel

Evening,
I thought today was going to be all house keeping and prep work but after lunch I got a call from the machine shop telling me the flywheel was surfaced and balanced - Yippee!
Found a couple of interesting things today that I'll mention in the picture captions....
The house keeping portions, cleaning out the threads on the block

How does this happen, notice the three marks?  The chain must have been really loose to cause this.

The oil feed line is installed and the ends for the cams now in place.  I have had a lot of troubles with leakage from these so I took extra precautions with these.  The cam cap on the intake side was sealed towards the back/outside with just a tiny bit of RTV and the oil feed line copper squish washers were coated with 'Copper Coat' a spray on sealant then torqued down to 20 N/M. 

The surfaced flywheel, not only is it surfaced but it is also balanced with the pressure plate.

Getting the engine off the stand so that I can install the flywheel

Down!


After removing the engine mounting fixture the flywheel is installed,  in the center you can see the pilot bearing that the input shaft for the transmission rides.  I was really sweating how I was going to get the old one out when I noticed it was LOOSE!  I pulled it out with my finger and carefully drove the new one in place.

Since I got such rave reviews for posting pages from my note book, here's another ;-)

A good day and tomorrow I may get the transmission back on the engine, I hope!  Then I might have the engine back in the car by next week-we'll see....
Thanks for looking,
Cheers,

Lynn


7 hrs

Wednesday, January 23, 2019

Setting the valves

There was a recent post on Jag Lovers asking if anyone had ever got the valves set correctly the first try.  I though I had it when all the exhaust settings were spot on at factory spec, then I went on to check the intake settings and they were all over the place!  I posted a page of the note book and you'll be able to see that it was a PITA.  I took a lot of pictures just to document the different aspects of setting the valves so that if I have second thoughts I can go back and look.

The valve gap is created by using shims of various thicknesses that fir under the tappet buckets.  In this picture you can see the shims in place on top of the valve stems on the exhaust side.

The rag is stuffed in the chest to catch any bolts that fumble fingers might drop.  That would be really bad news and likely require complete disassembly of the bottom of the engine!

Tappet buckets sitting on top of the shims, each one is marked to go back in the same bucket guide.


Each time you have to remove the cam and replace the shim, each time trying to get just a bit closer to the correct spec. of 6/1000 ths" for exhaust and 4/1000 ths" intake.  Great care has to be taken to keep the cams in the correct position during the installation of the cams, if they pop out of position it could damage the valves requiring a complete rebuild of the head.

The 'new' sprocket gears, bolts treated with lock tight and safety wired.


Cheating just a bit as I don't have the cam cover gaskets yet


Well, that's all for today.  Still waiting for the flywheel that we sent off for surfacing and balancing.

Cheers,
Lynn


7 hrs